- 4 rolls – Tennis Court – 516 Linear Feet – 2”x150’ each
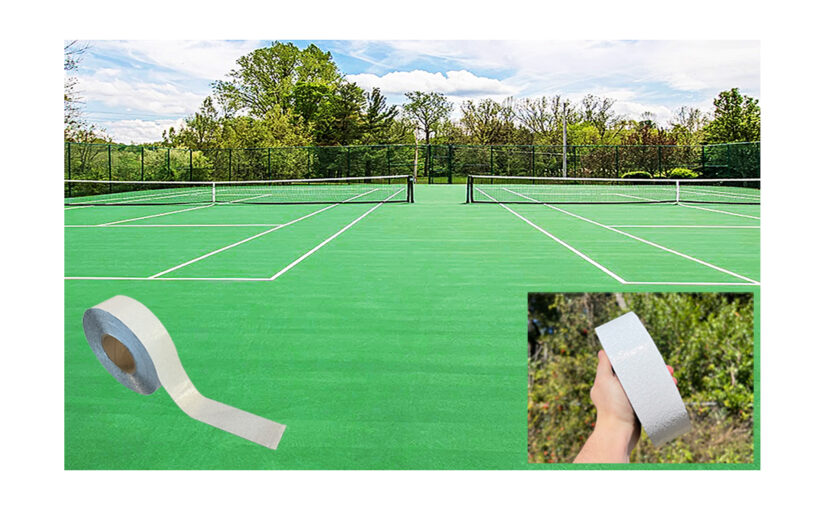
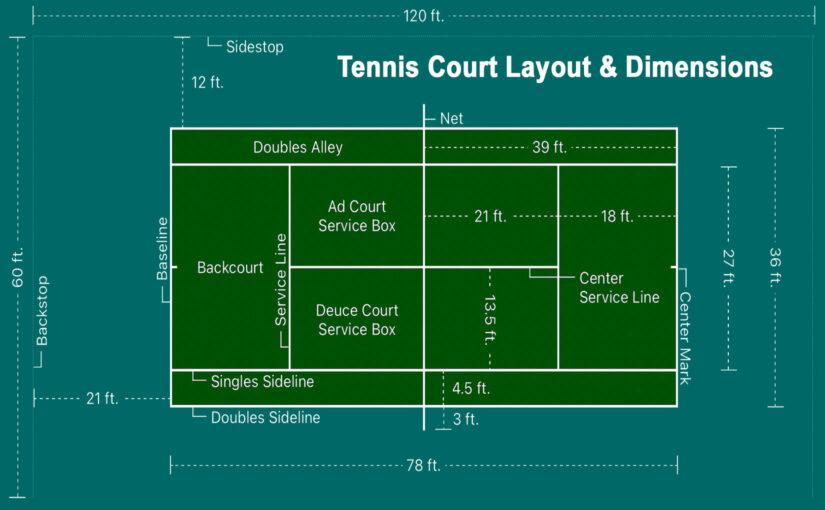
Tennis courts require 4 rolls of 2 inch x 150′ rolls of court tape. A standard court is 78 feet long x 36 feet wide. The net is 42 inches tall at both ends, and 36 inches tall in the center.
Tennis courts require 4 rolls of 2 inch x 150′ rolls of court tape. A standard court is 78 feet long x 36 feet wide. The net is 42 inches tall at both ends, and 36 inches tall in the center.
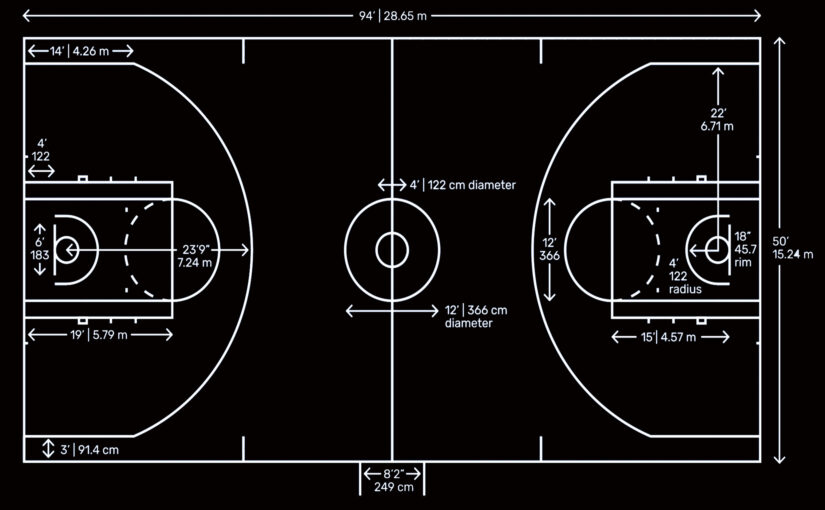
Basketball Courts require approximately 425 linear feet of 2 inch striping for a half court and 850 linear feet for a full court. A full court of 94 feet long by 50 feet wide. A half court is 47 x 50 feet. Feet throw lines are 10 feet away from the goal. The hoop is 10 feet off the ground for a regulation goal. The diagram at the top of this page shows all line dimensions and distances.
Basketball Courts are often laid out by themselves (stand alone). Often they are modified to a smaller scale for home courts, and often they are superimposed over an existing court. Regardless of the size, all courts need boundary lines and free throw lines at a minimum. The estimated number of striping rolls at the top of this page is for all the lines on a regulation court. For smaller or abbreviated courts, fewer rolls are needed.
For a stand alone court on asphalt, white would be used. For stand alone courts on light colored cement, yellow would also be used to provide contrast. The important thing is that the lines be clearly visible. Temporary lines are often used so that they can be taken up when the tennis courts are needed again. Our pickle ball court tape is rated for both permanent and temporary applications. For temporary courts, use less pressure when pressing in the tape, and remove it within a few days. It may leave a slight residue, but this will burn off in the sun over time.
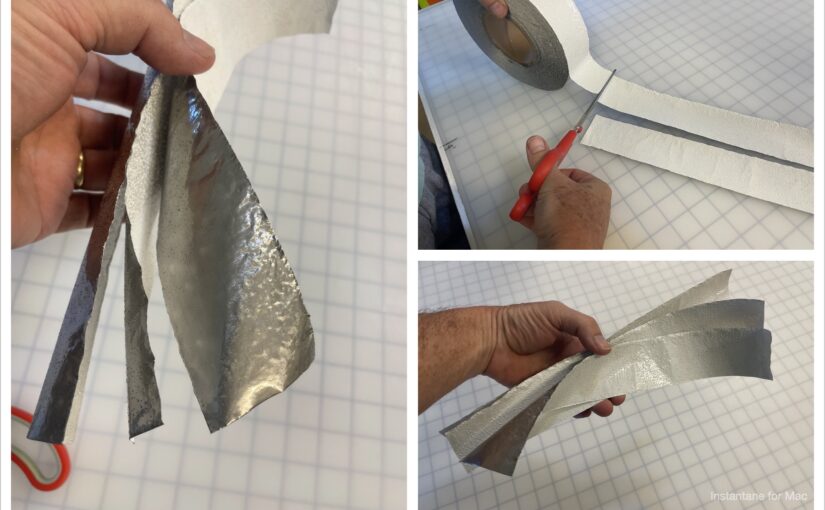
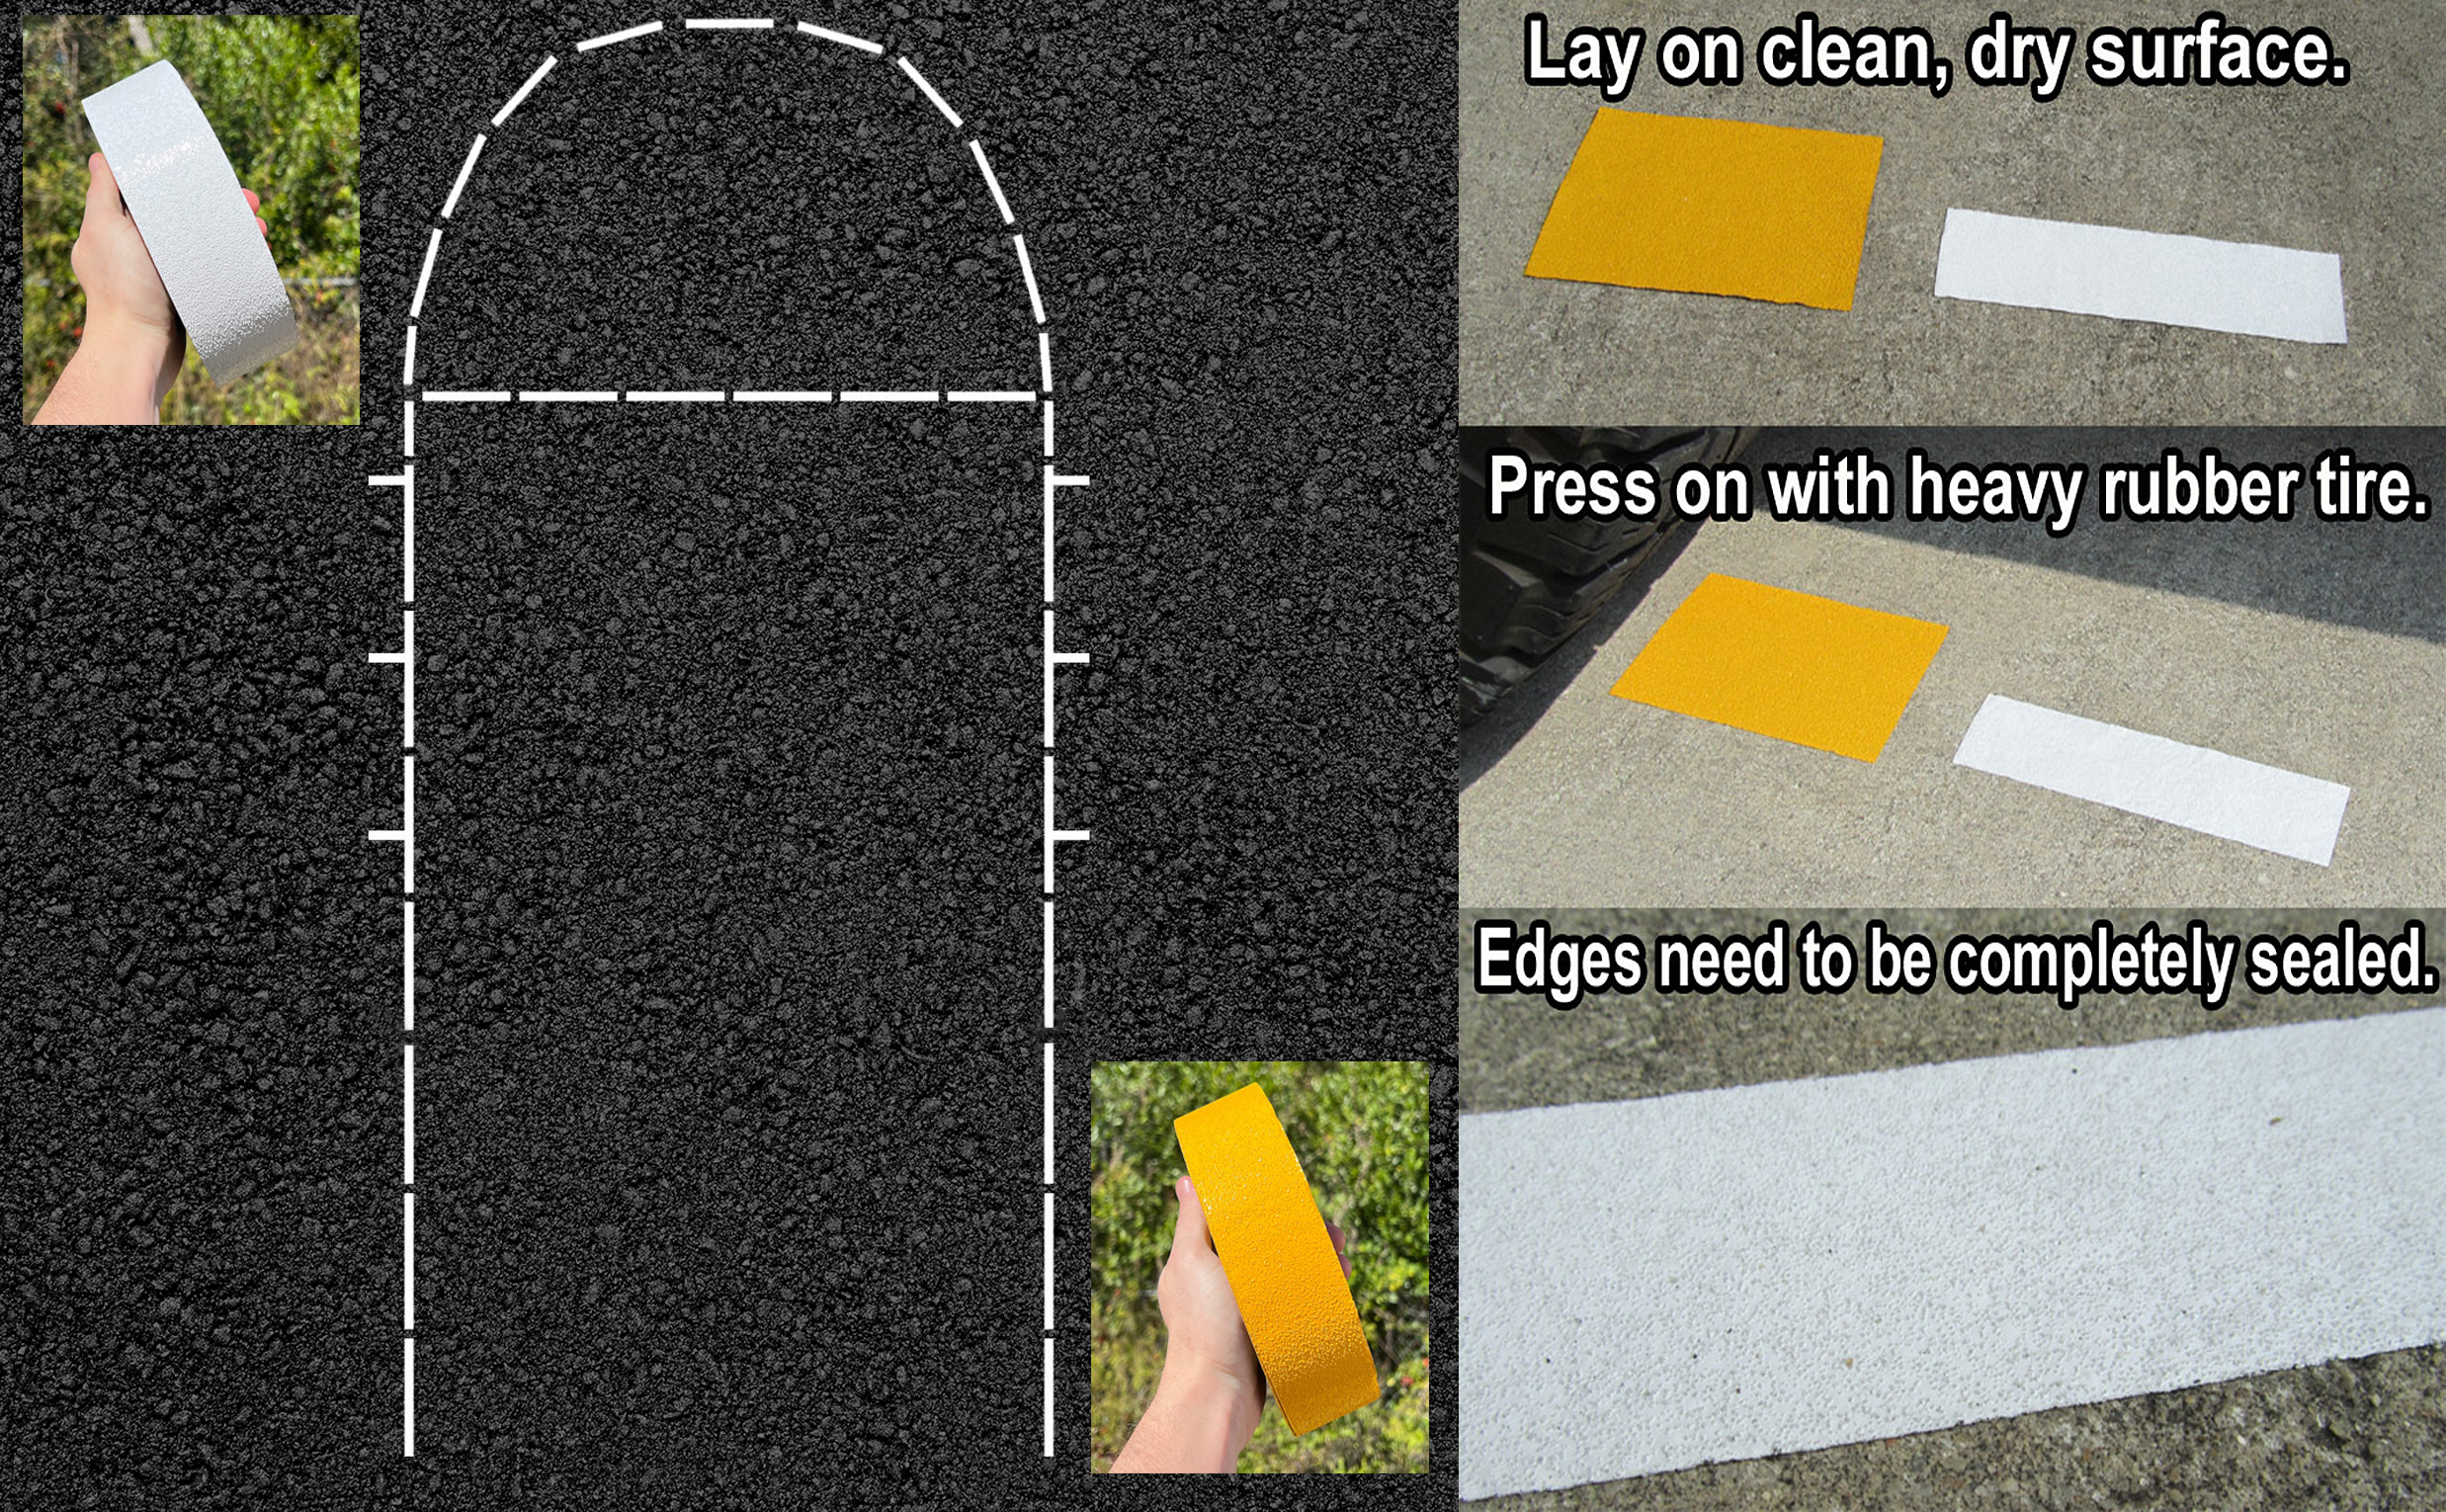
Note – aluminum based court marking tape is good for straight lines but will not pull a curve. So to create curved lines, cut sections of striping and make curved lines using dashes. See article on Making Curved Lines with Court Tape
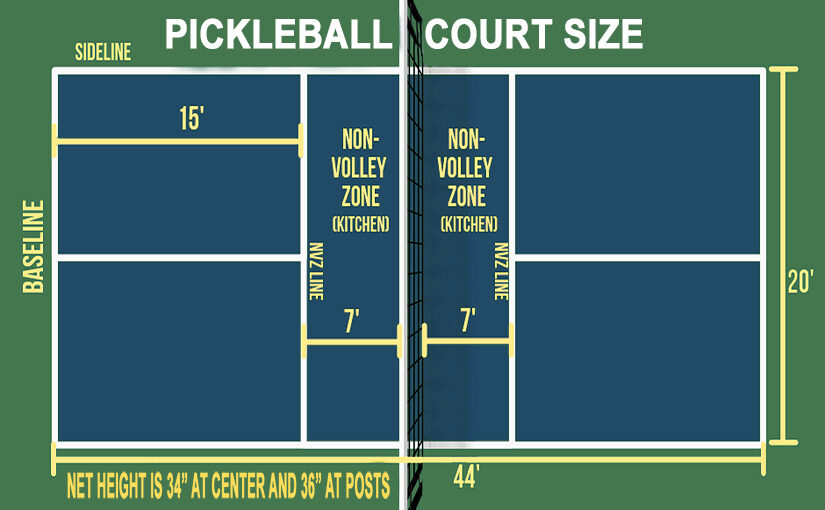
Pickle Ball Courts require approximately 198 linear feet of 2 inch striping. The total length of a court is 44 feet and the width is 20 feet. This is about 1/3 the size of a standard size tennis court. 880 square feet versus 2808 square feet. The net height is 36 inches high at the sidelines and 34 inches high in the middle.
Pickle Ball Courts are often laid out by themselves (stand alone). However, it is very common to see them superimposed over existing tennis courts. One configuration is to use the tennis court net as center and layout a Pickle Ball court within the confines of the existing court. Another layout is where a pickle ball court is laid out on both ends of a tennis court with nets installed for each court.
The diagram at the top of this page outlines how the lines should be marked. For a stand alone court on asphalt, white would be the norm. However, when superimposing a pickle ball court over a tennis court, yellow tape will often be used to differentiate the pickle ball lines from the tennis court lines. For stand alone courts on light colored cement, yellow would also be used to provide contrast. The important thing is that the lines be clearly visible.
Temporary lines are often used so that they can be taken up when the tennis courts are needed again. Our pickle ball court tape is rated for both permanent and temporary applications. For temporary courts, use less pressure when pressing in the tape, and remove it within a few days. It may leave a slight residue, but this will burn off in the sun over time.

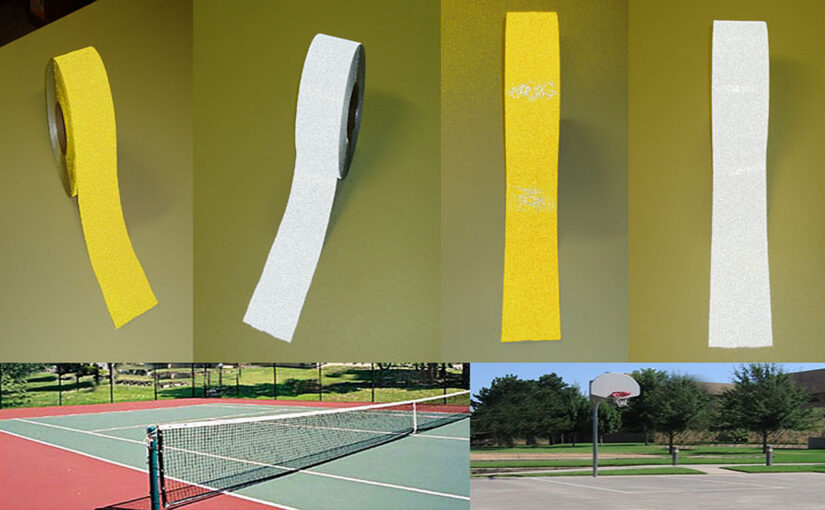
Our court tapes are popular for marking basketball, tennis and pickle ball courts. Chosen by schools, universities, city athletics departments, churches, HOAs and individuals, our court tapes are easy to install and long lasting. Available in both white and yellow, the material is foil-based with a long lasting medium tack adhesive. Court tape is ideal for concrete or asphalt surfaces since the aluminum construction of the tape conforms well to both when installed properly. Also, as this tape can also be used for temporary traffic marking, it is easy to remove.
Estimated number of 150 foot rolls for various courts-
Notes:
Installation Instructions
Court tape should be installed on surfaces that are clear of dirt, dust, water, grease, oil or anything else which would create a barrier to the adhesive. Best when applied to a clean, dry surface. Position court tape into desired layout. Roll over the tape and press into the surface so that it conforms to the asphalt making 100% contact with a heavy bouncy rubber vehicle tire such a car or a golf cart. Make multiple passes over the tape in a linear direction without twisting on the new material. The more passes the better. Although there is a medium-tack adhesive, the long lasting bond between the tape and surface is created from the foil conforming to the surface texture. All edges should be secured to surface to avoid air, water or dirt intruding under tape which will cause lifting. Additionally, temperature should be above 50 degrees Fahrenheit. Best results achieved when there has been no rain or water on surface for 48 hours before or after installation. For temporary areas, court tape can be removed by flashing tape with a weed burning torch which will vaporize adhesive then lift at edges.
Common Causes of Unsuccessful Installations
Tennis Courts and Pickleball Courts have straight lines. So striping them with aluminum based long lasting court tape is not a problem. In fact, since the tape only wants to go straight, it is easier to stripe straight lines with aluminum based tapes than with other types of striping tape. However, Basketball Courts have straight lines and curved lines. So the question is, how do you form a curve with a tape that will only go straight. The solution is through the use of dashed lines. In other words, use short pieces of our court marking tape to create your curves and the problem is solved. The image above shows an example this method.
To apply, simply cut a stack of strips that are the same length. Create a radius (curve) and mark it with either pencil, or a faint chalk mark. You can also take strips of masking tape and lay them down until you are satisfied with the layout. Then replace the masking tape with court tape. With all applications, make sure the surface is clean and dry, and press the tape in very will until it conforms.
Our court tape is available in both White and Yellow. The question many customer have is which they should use for their courts. White is the most popular color and used for most applications. However, Yellow has the advantage of having more contrast on a light colored surface like a driveway or cement floor. So the answer to which color to use is all about contrast. For asphalt, dark painted surfaces, or darker cement, use White Court Marking Tape. For lighter concrete surfaces like cement parking lots or driveways, use Yellow Court Marking Tape to achieve proper contrast.
Whichever you choose, only apply to a clean, dry surface. And press in the tape very will until it completely conforms to the surface. This will assure a long life for either white or yellow court marking tape.